
 Song-saem: From Planner to Developer with AIBlog home →
Building Web App Screens: Hand AI Your Brief and Run It on Your Own PC (Build Your Own Scheduler, Part 5)
Saving and login wait for the next part; we start with the scheduler’s screens using sample schedules. This post covers opening a terminal and running a Next.js project on your PC, a request that gives AI the brief, the structure and this step’s scope together, a table for checking the screens, and what to look at when dates are off by one day, with a request to fix it.

How do you start building web app screens? Put saving and login aside for now and bring up the screens first with sample schedules. Seeing the screens shows what the brief missed, and narrows each fix down to one screen. In this part we hand AI the part 3 brief and the part 4 structure, and check the Today, This week and Add/Edit screens on our own PC. This is part 5 of the “Build Your Own Scheduler” series.
What this part does and doesn’t do
| Done in this part | Left for later parts |
|---|---|
| Create a Next.js project | Connect a database (Supabase) |
| Run the development server on your PC | Login and access rules for your own schedules |
| See Today and This week with sample schedules | Put it on the internet (deploy) |
| Check adding, editing, deleting and marking done | Add it to your phone’s home screen |
We split the scope to narrow down causes when something goes wrong. Build screens, saving and login all at once, and when “my schedule doesn’t show” you can’t tell whether the screen, the saving or the permissions are to blame. Features that come to mind while looking at the screens (say, viewing work and personal tasks separately) are better written down for later than added now.
1. How do you create the project?
Commands go into the terminal, a window where you give the computer commands as text. In VS Code, open one from the top menu with Terminal → New Terminal. You need the Node.js installed in part 2; according to the Next.js docs it must be 20.9 or later (check with node -v).
If you don’t know where to start, ask AI to guide you step by step.
“I’m new to development and I use VS Code on Windows. Node.js is installed. I want to prepare a new folder for my own scheduler and start a Next.js project. Tell me one step at a time where to click and what to type. When I show you the result, move on to the next step.”
A chat AI guides you through the steps; an AI coding tool that can reach your files and terminal (such as Claude Code) can also do this step itself.
The basic command to create the project is below. It makes a project folder named my-scheduler.
npx create-next-app@latest my-schedulerAlong the way it asks whether to use the recommended defaults. These include TypeScript and the App Router, so if you’re new you can just pick them. The questions can change between versions; for this series, all that matters is TypeScript and the App Router. Take a screenshot of any unfamiliar question and show it to AI.
When it finishes, run these two lines one at a time. The first goes into the project folder; the second runs the web app on your computer.
cd my-scheduler
npm run dev
Open the address shown in the terminal (usually http://localhost:3000) in your browser to see the first screen. localhost points to your own computer, so it isn’t on the internet yet. Closing the running terminal can cut the connection, so keep it open while you work.
2. What do you hand to AI?
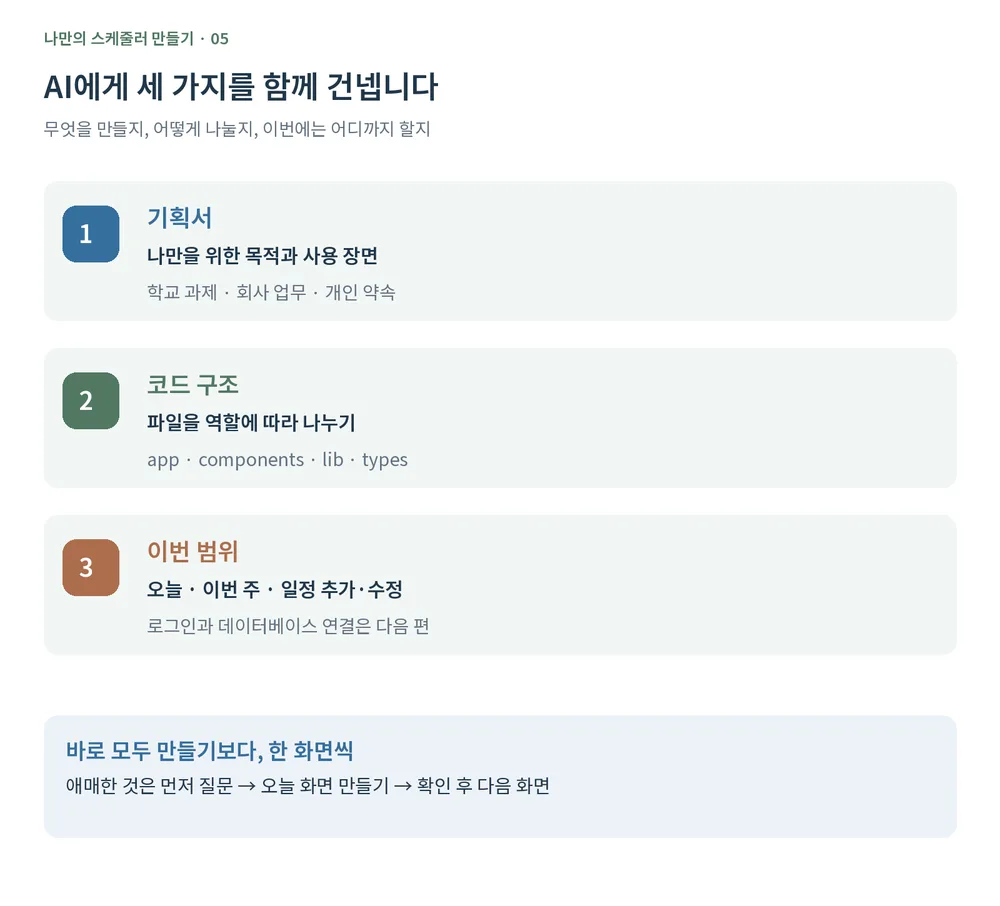
Hand over three things together.
| What to hand over | Content | If it’s missing |
|---|---|---|
| What to build | The part 3 brief | Screens come out different from what you wanted |
| How to split it | The part 4 folder structure | Files pile up in one place and are hard to fix later |
| How far to go this time | This step’s scope | AI tries to build the login and saving in the brief too |
The third matters most. The part 3 brief includes login and saving, so say plainly that this time it’s screens only. Paste your brief under the request below.
“I’m new to development. I’m building a scheduler just for me from the brief below. I want to manage the school, work and personal tasks I need, and be able to add features later. - Scope: build only three screens, Today, This week and Add/Edit. Login and the database connection come in the next step. - Structure: screens in app, parts in components, shared functions in lib, data shapes in types. - Sample schedules: make 5–6 based on today’s and this week’s dates. Include ones with no time, with a memo, and already done. - Behavior: make adding, editing, deleting and marking done work on screen. Keep changes when moving between Today and This week, and go back to the sample schedules on refresh. - Dates: use Korea time, and this week runs Monday to Sunday. - Screens: make text and buttons large enough to read easily on a phone. - Process: if anything is missing or unclear, ask me first. After sorting out the answers, build one screen at a time and tell me which files changed and how to check them.”
Rather than building all three at once, I recommend checking Today first. If its look and behavior are fine, move on to This week and Add/Edit.
3. How do you add sample schedules?
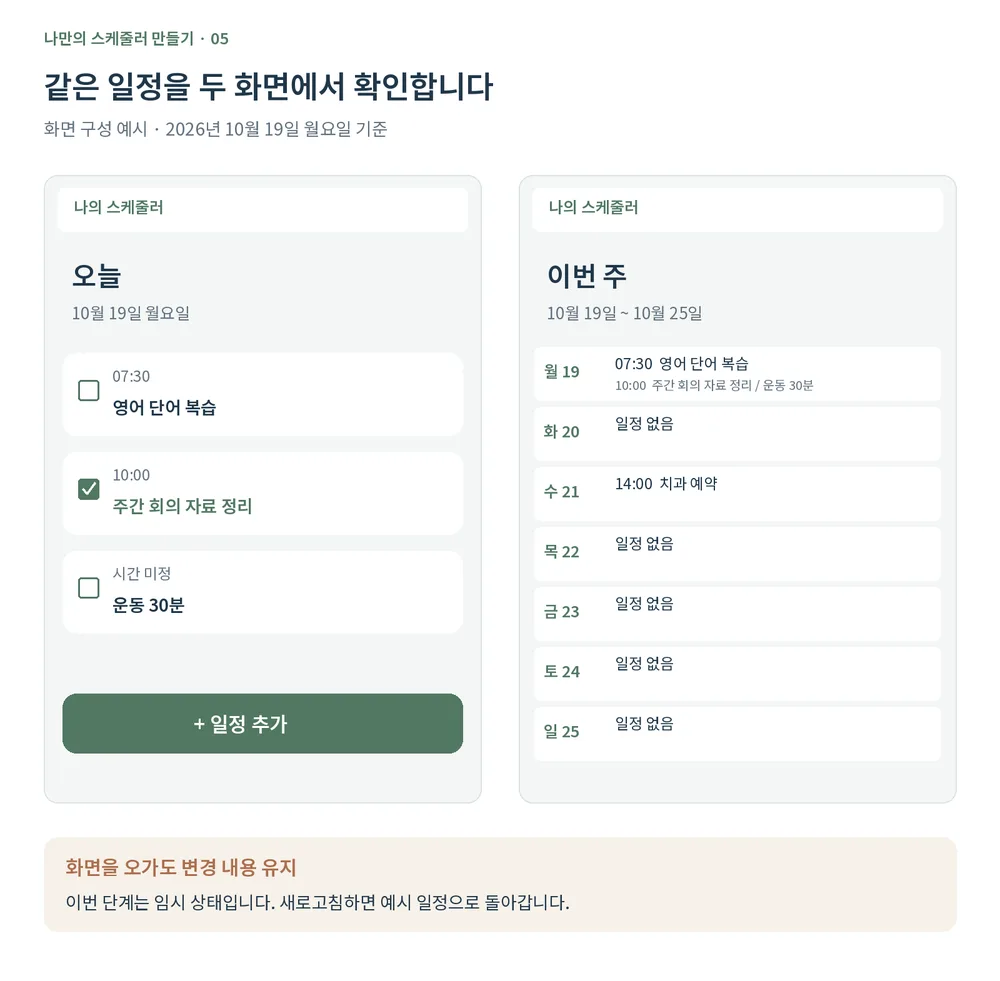
Without saving, there’s nothing to show on screen. So we prepare schedules for checking in the code. This is called “sample data.” What AI makes looks roughly like this.
// lib/sample-schedules.ts : sample schedules for checking screens (replaced by real saving in part 6)
// Ask for dates that match today and this week on the day you build it.
import type { Schedule } from "@/types/schedule";

export const sampleSchedules: Schedule[] = [
  { id: "1", title: "Memorize 30 English words", date: "2026-10-19", startTime: "07:30", memo: null, done: false },
  { id: "2", title: "Prepare weekly meeting notes", date: "2026-10-19", startTime: "10:00", memo: "Check last week’s numbers", done: true },
  { id: "3", title: "Dentist appointment", date: "2026-10-21", startTime: "14:00", memo: "Bring the clinic card", done: false },
  { id: "4", title: "Sort out materials this week", date: "2026-10-23", startTime: null, memo: null, done: false },
];
Three things to check when choosing samples:
- Match your own life. A student might add assignments and exam prep; an office worker, meetings and report deadlines; personal life, a doctor’s appointment and exercise. That makes it easier to judge whether the screens are useful.
- Mix different cases. Tasks with no time, long titles, long memos and done items reveal the gaps on screen.
- Use dates from the day you build. Copy the dates in this post as they are and, once they pass, the Today screen looks empty and you may think it’s broken.
Good to know: changes stay when you move between Today and This week, but a refresh brings back the original samples. That’s a deliberate choice at this step. The running app only remembers changes for a while; nothing is saved to a database. It’s the difference from part 4 between “changing the list on screen” and “saving to the database.”
4. What do you check when the screens are done?
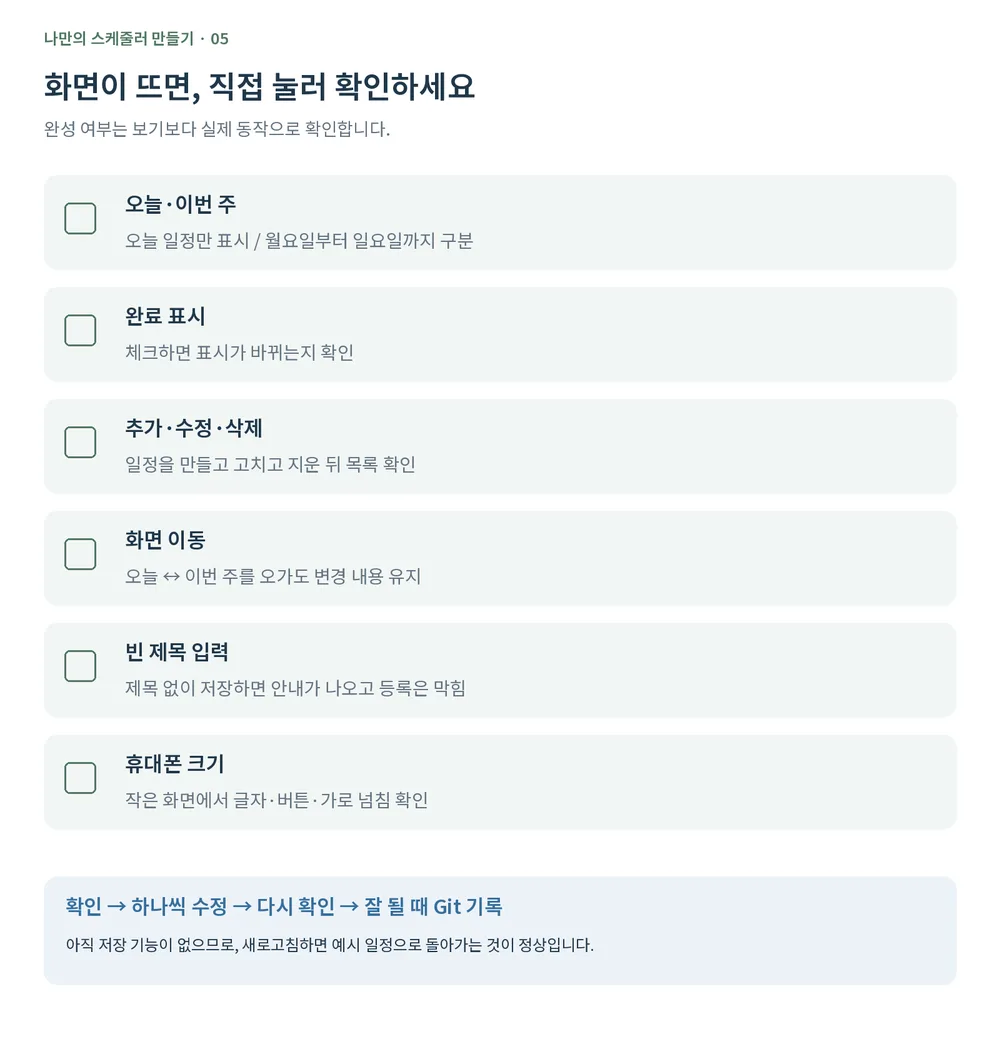
Seeing a screen isn’t the end. You have to click and type to find what’s missing.
| What to check | How | Normal result |
|---|---|---|
| Today screen | Open /today | Only today’s sample schedules show |
| This week screen | Open /week | Split by date from Monday to Sunday |
| Marking done | Click the checkbox | The mark changes |
| Add, edit, delete | Add, change and remove one schedule each | The list updates right away |
| Moving between screens | Go Today ↔ This week | Your changes are still there |
| Refresh | Refresh the browser | Back to the original samples (normal at this step) |
| Empty input | Save with no title | Not saved, and a message appears |
| Phone size | Device mode in Chrome DevTools | Text doesn’t shrink and the screen doesn’t overflow sideways |
To check phone size, open DevTools in Chrome with F12 and click the phone-and-tablet icon (Toggle device toolbar). It shows how the layout changes with screen width. Opening it on a real phone comes in part 7, after it’s on the internet.
5. What if dates are off by one day?
If the Today screen shows yesterday’s schedules in the morning, suspect the time zone. JavaScript’s toISOString() expresses date and time in Coordinated Universal Time (UTC). Korea is 9 hours ahead of UTC, so if you convert the current time this way and cut out just the date, you can get yesterday’s date before 9 a.m. Korea time. Building the date text from your computer’s local time avoids this.
// lib/dates.ts : build date text like "2026-10-19" in your computer’s local time
export function toDateKey(d: Date): string {
  const y = d.getFullYear();
  const m = String(d.getMonth() + 1).padStart(2, "0");
  const day = String(d.getDate()).padStart(2, "0");
  return `${y}-${m}-${day}`;
}
If you see this, ask AI like this:
“When I open the Today screen at 8 a.m. Korea time, yesterday’s schedules show. Check whether the code that makes today’s date uses a UTC date. Fix it to use Korea time, and tell me which file and function you changed.”
Decide where the week starts, too. JavaScript’s getDay() returns 0 for Sunday and 1 for Monday. That value alone doesn’t decide where the weekly screen starts, so write “Monday to Sunday” clearly in your request.
6. How do you ask for fixes?
- Ask for one thing at a time. Fix text size, button position or schedule order one by one and check each result.
- State the scope. “The title in one schedule row is small. Make it easy to read on a phone. Check the schedule part first, and don’t change other features.”
- Hear the reason before other files change. A fix may need several files, so add “If other files need changing too, explain why first” to keep track of the scope.
- Re-check the table in section 4 after a fix. Fixing one place sometimes changes another.
- Record it when it works. When you like the state, ask your AI coding tool: “Review the current changes and commit them to Git. Say in the commit message what is finished.” A commit records the current code, so it’s a point to return to if the next change goes wrong. With a chat AI, ask for step-by-step instructions to commit.
In short
- Build and check screens with sample schedules before saving and login.
- Hand AI the brief, the structure and this step’s scope together, and have it ask about anything unclear first.
- Match sample schedules to your life, with dates from the day you build.
- Changes staying after moving between screens, and resetting on refresh, is normal at this step.
- Ask clearly for Korea time and weeks starting on Monday.
- Fix one thing at a time, state the scope, and record in Git when it works.
At ONE-PEX, when we build the business system FROX, we also bring screens up with sample data first and check them with the people who will use them before adding saving. Many gaps only show once you see the screen.
Next (Part 6): We replace the sample schedules with real saving. We create a schedules table in Supabase and connect login and an access rule that “only handles my own schedules,” so schedules stay after a refresh.
Sources (checked 2026-10-17)
- Next.js docs, Installation
- Chrome DevTools, Device Mode
- MDN, Date.prototype.toISOString()
- MDN, Date.prototype.getDay()
Related reading: Build Your Own Scheduler, Part 3: How to write a web app brief · Part 4: Web app code structure

A software planner who became a developer after two years of working with AI five to twelve hours a day. Today I build FROX, an AI-powered business system, at ONE-PEX.
More posts
- What Can You Build with AI?Orders in KakaoTalk, Stock in Excel, Receivables in a Notebook: Changing Messenger Orders Only the Owner Understands (Food Supplier, Part 1)
- What Can You Build with AI?I Fixed My TWA App, So Why Didn't It Change? What I Learned from the War with Caching
- What Can You Build with AI?Details Matter: Splitting 3D Characters and Vehicles So They Can Move (Building Road Voca 2, Part 5)